o Remove the electrical wiring harness from the conveyor.
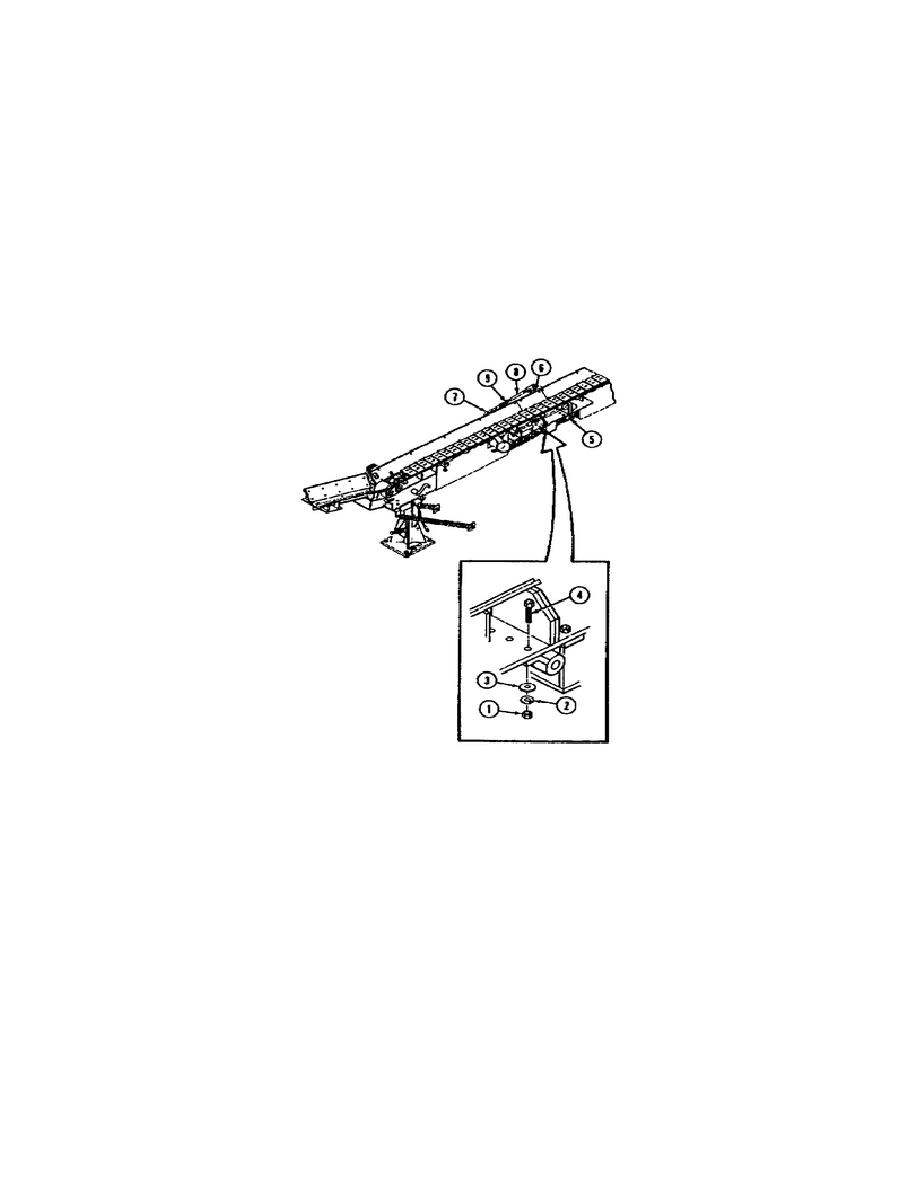
NOTE: All item numbers refer to Figure 21.
With the components removed, continue the removal process by following the steps
outlined:
o Remove the three nuts (1), lockwashers (2), flat washers (3), and screws (4)
from the two hinge halves (5).
NOTE: Allow the hinge halves to remain secured to the center section (6).
o Release the toggle clamps (7), disconnect the tube assembly (8) from the
safety hooks (9), and remove the drive end section from the conveyor
assembly.
Figure 21.
Conveyor Assembly Drive End Section Assembly.
Disassemble the drive end section assembly by performing the following maintenance
tasks outlined separately in the lesson:
NOTE: Tag hoses and fittings upon removal to ensure proper installation.
o Remove the hydraulic motor.
o Remove the drive end section coupling sprocket, pillow blocks, and drive
sprocket assembly.
27
OD1737


 Previous Page
