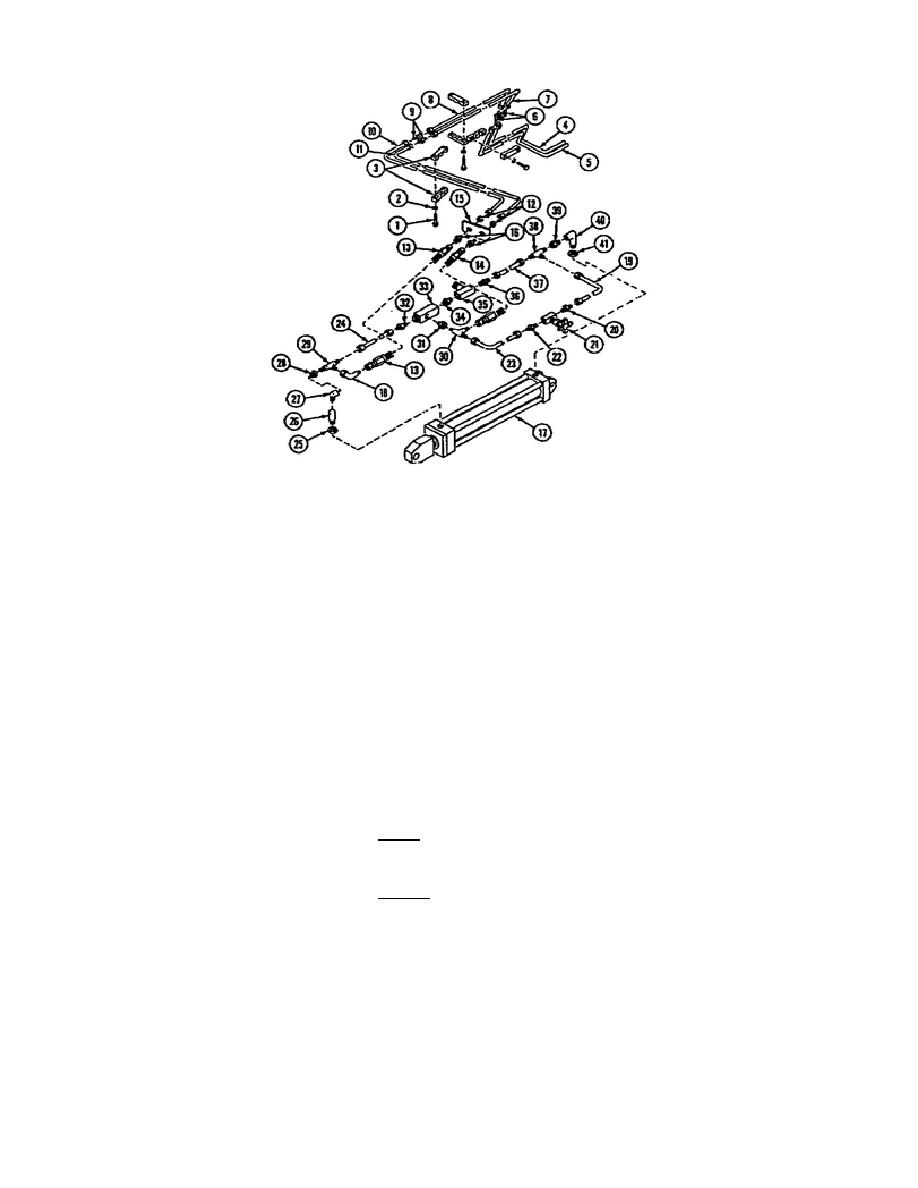
Figure 26. Upper Rear Door Hydraulic
Actuator and Components (Exploded).
o Loosen the tube assembly (24), locknut (25), and turn the elbow
(26) to disconnect the tube assembly (24).
Remove the tube
assembly (24), elbows (26 and 27), adapter (28), and tee (29) as
an assembly (separate components if necessary).
o Remove the tee (30) and adapters (31).
o Remove the adapters (32, 39, and 34), pilot check valve (33),
flow control valve (35), connector (36), tube assembly (37), tee
(38), and elbow (40). Remove the locknut from the elbow (40).
Install the upper rear door hydraulic actuator tubes,
hoses,
and
associated connecting parts following the procedure listed:
o Install the flow control valve (35) with the metered flow arrow
pointing towards the REAR of the vehicle.
o Install the pilot check valve (33) with the free flow arrow
pointing towards the FRONT of the vehicle.
o Apply pipe sealant to all male pipe threads (TM 9-2350-267-20,
Appx. D, Item 57).
o Reverse the removal procedures.
29
OD1703


 Previous Page
