

M2/M3 BFV: HULL POWER DIST SYSTEM - OD1606 - LESSON 1/TASK 1
g.
Volts Gage.
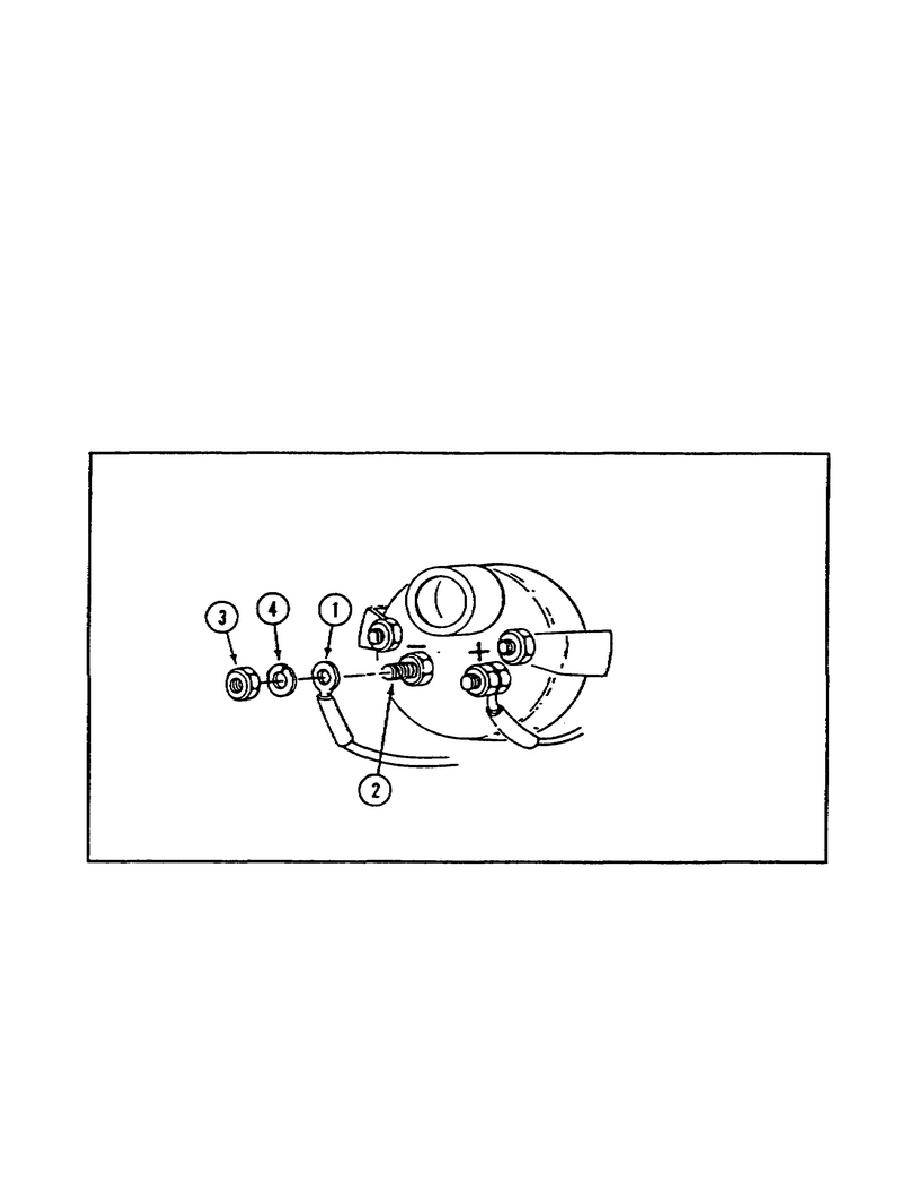
To replace the volt gage, first, remove the lamp
socket from the back of the gage.
Once the lamp socket has been
removed, remove the nut (3) (figure 30), lock washer (4), and lead
1W10-M1- (1) from the negative terminal (2) of the gage. Be sure to
tag the lead as soon as it is removed.
After lead 1W10-M1- has been removed from the gage, remove the nut
(7) (figure 31 on the following page), look washer (8), and lead
1W10-M1+ (5) from the positive terminal (6) of the gage. Again, be
sure to tag the lead as soon as it has been removed.
Now remove the two nuts (11) (figure 32 on the following page) from
the two posts (12) on the gage (9). Push the volt gage from the two
brackets (13) and out the front of the instrument panel (10).
FIGURE 30.
REMOVING LEAD 1W10-M1- FROM
THE NEGATIVE TERMINAL OF
THE VOLTS GAGE.
This completes the volt gage removal procedures. The paragraphs that
follow are the procedures for installing the volts gage.
While
reading through these paragraphs on installing the volts gage, refer
back to figures 30 through 32 on this and the following page.
33

 Previous Page
