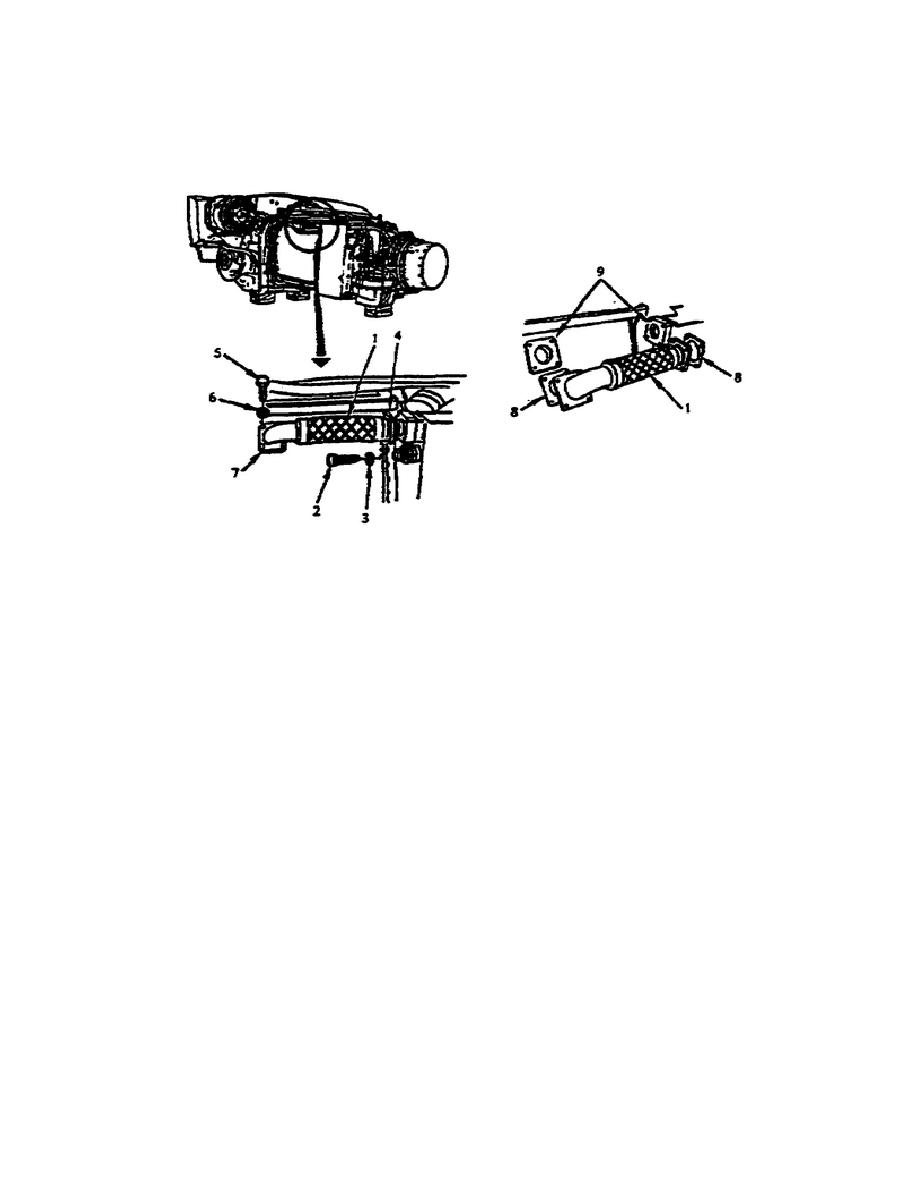
remove the four short bolts (5) and lockwashers (6) from the elbow
(7), lift the tube assembly (1) from the powerpack, and scrape the
two oil tank vent gaskets (8) off the mounting surface (9) (fig.
1-2).
Figure 1-2.
Hose Assembly (Oil Tank Vent).
Remove the Engine Starter.
Prior to starting the actual removal
process, you first must identify the starter's part number on the
starter's identification place.
This engine may use one of three
different types of starters, identified by the part numbers: 1114673
(1), 1114678 (2), and M0017414MA, MB, AND MC (3) (fig. 1-3). What
differentiates the starters is the location of their wiring.
To
remove any of the three starters, you must first remove its wiring.
This lesson describes the process used to remove the wiring from
starter part number M0017414MA. Be sure to check TM 9-2350-264-20-
1-4 for the correct process to remove wiring from the starter you
must remove.
To remove a starter that has part number M0017414MA, first cut and
peel off the adhesive from the starter motor terminal 3B101-NEG (2)
and solenoid terminals 3L101-2 (3) and 3L101-1 (4).
With all the
adhesive removed, you then remove the two nuts (5) and lockwashers
(6) from the 3B101-NEG terminal and the 3L101-2 terminals (fig.
1-4).
After you have removed the nuts, lift the two terminal lugs 3W101-
1E2 (7) off terminal 3B101-NEG (2) and 3W101-2E2 (9) and 3W109-E1
(10) from terminal 3L101-2 (3); then move the lugs away from the
starter (8) and solenoid (fig. 1-4).
4
OD1707


 Previous Page
