PRECISION MEASURING AND GAGING - OD1642 - LESSON 1/TASK 2
NOTE
Remember that 1 complete revolution of the thimble is
0.5mm.
It takes two complete revolutions to advance
it to 1mm.
(d) Measuring With The Micrometer.
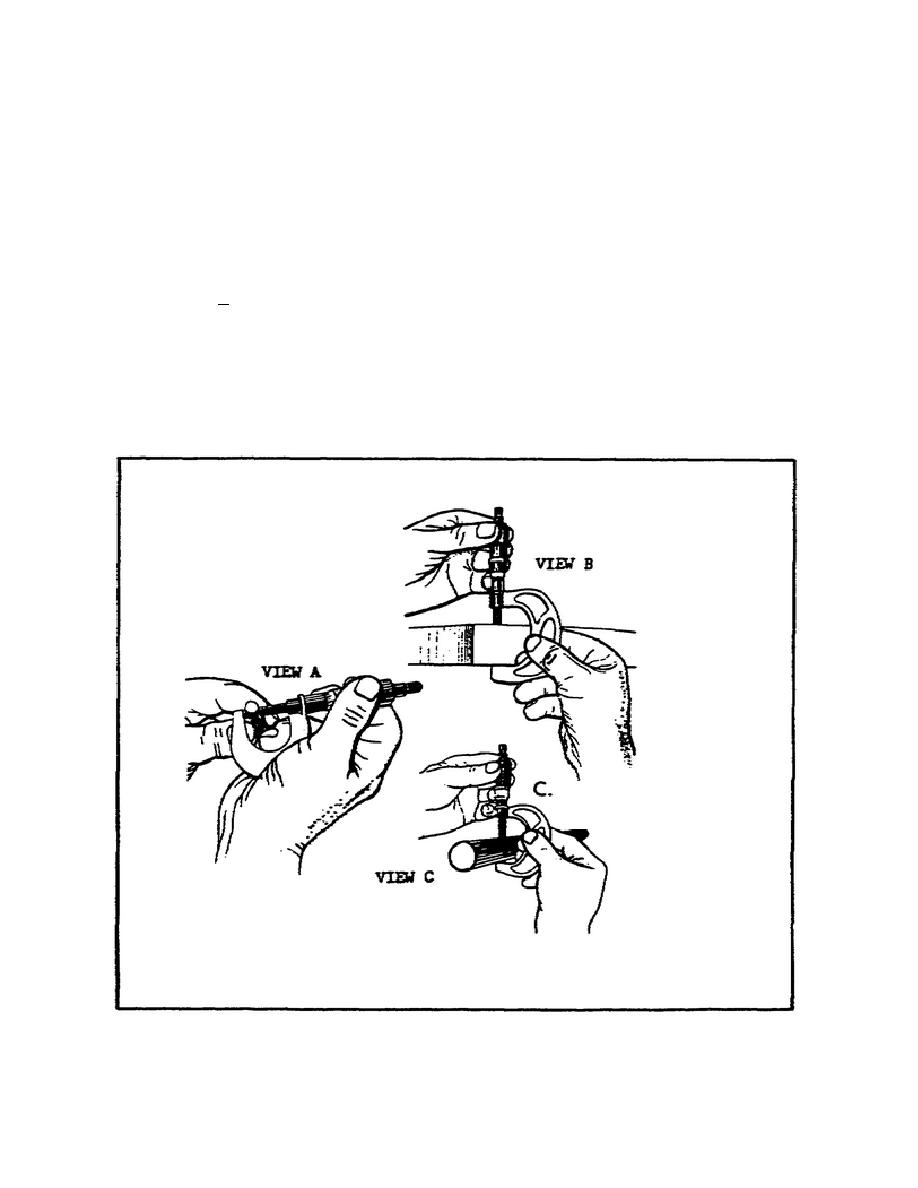
1 When checking a small part with the use of a micrometer
(figure 40, view A, hold the part in one hand. Hold the micrometer in the
other hand so that the thimble rests between the thumb and the forefinger.
The third finger is then in a position to hold the frame against the palm of
the hand. The frame is supported in this manner making it easy to guide the
work over the anvil. The thumb and the forefinger are in position to turn
the thimble either directly or through the ratchet, bringing the spindle
down against the work.
FIGURE 40.
USING OUTSIDE MICROMETER.
61


 Previous Page
