PRECISION MEASURING AND GAGING - OD1642 - LESSON 1/TASK 2
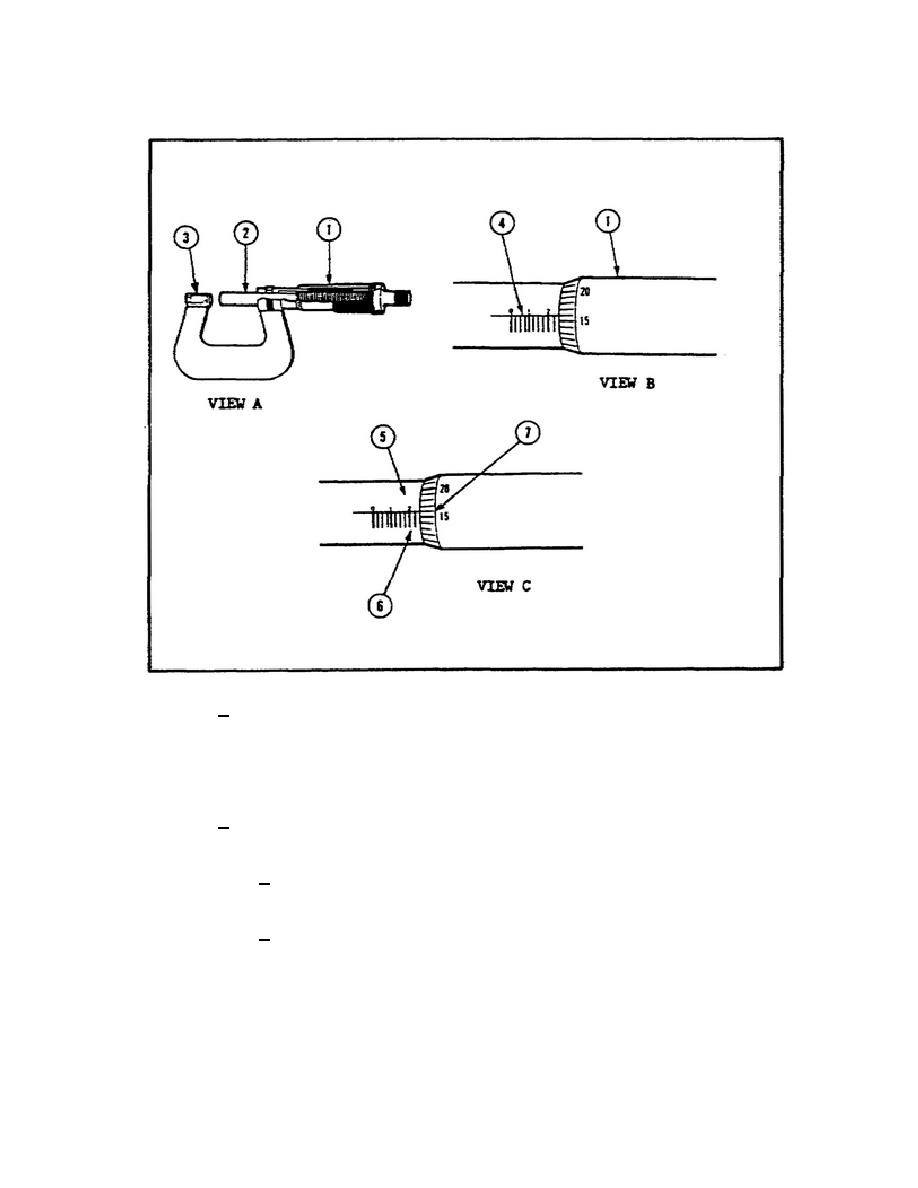
FIGURE 37.
READING A STANDARD MICROMETER.
3 The beveled edge of the thimble is graduated into 25 equal
parts.
Each line indicates 0.001 of an inch, and one complete and exact
revolution of the micrometer screw and the thimble moves the spindle away
from or toward the anvil exactly 0.025 of an inch. Every fifth line on the
thimble is numbered to read a measurement in thousandths of an inch.
4 To read a measurement on the standard micrometer use figure
37, view C, and perform the following:
a Read the highest figure visible
on the barrel (5)............ 2 = 0.200 in.
b Number of lines visible between
the No. 2 and the thimble
edge (6)..................... 1 = 0.025 in.
57


 Previous Page
