USE/CARE OF HANDTOOLS & MEASURING TOOLS - OD1621 - LESSON 3/TASK 1
thimble and adding to this any fraction of a revolution.
The micrometer
screw has 40 threads per inch.
This means that one complete and exact
revolution of the micrometer screw moves the spindle away from or towards
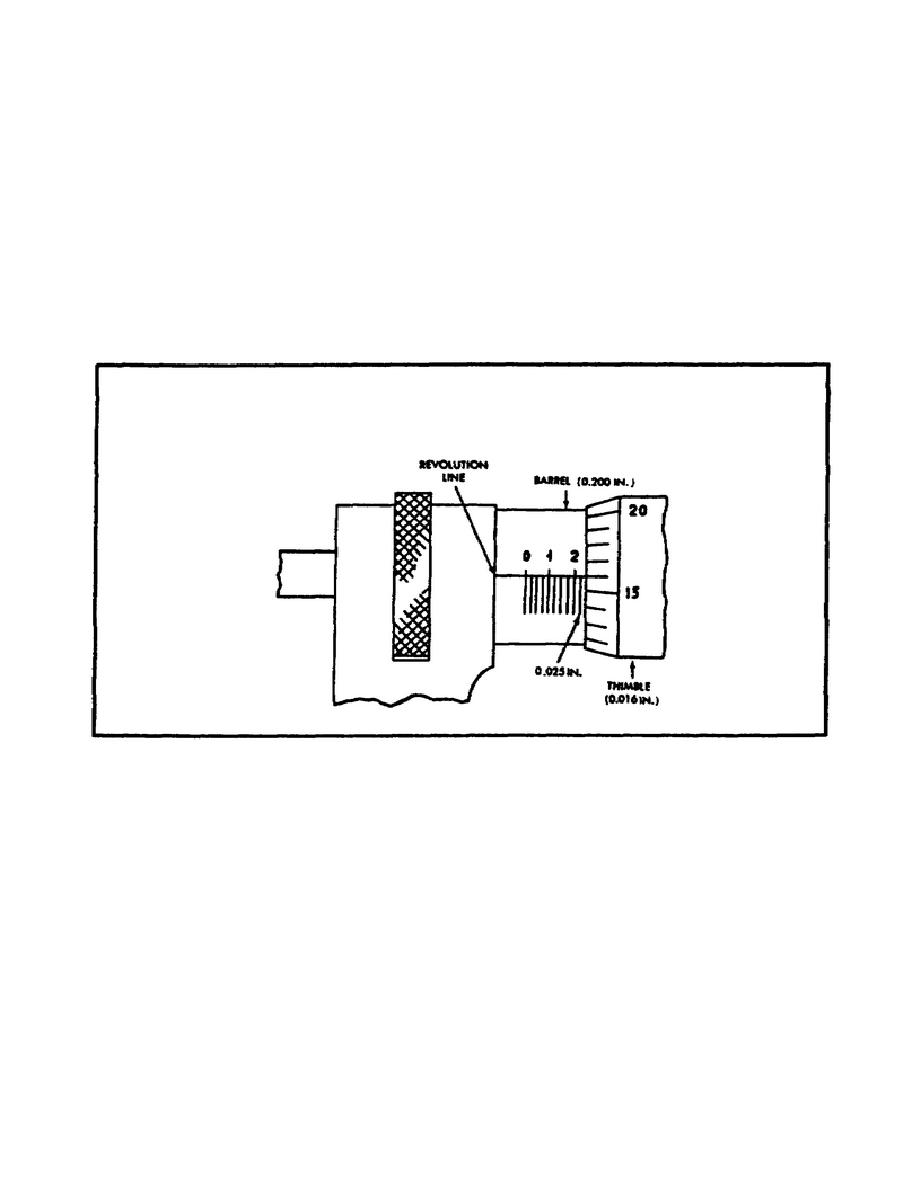
the anvil exactly 0.025 inch. The lines on the barrel (figure 192) conform
to the pitch of the micrometer screw, each line indicating 0.025 inch, and
each fourth line being numbered 1, 2, 3, and so forth. The beveled edge of
the thimble is graduated into 25 parts, each line indicating 0.001 inch,
1/25 of the 0.025 inch covered by one complete and exact revolution of the
thimble. Every fifth line on the thimble is numbered to read a measurement
in thousandths of an inch.
Read measurement shown in figure 192 as
indicated in (a) through (d) below.
FIGURE 192.
READING STANDARD MICROMETER SCALE.
(a) Record highest figure
visible on barrel ................ 2
=
0.200 in.
(b) Number of lines visible
between the No. 2 and
thimble edge ..................... 1
=
0.025 in.
(c) The line on the thimble
that coincides with or
passed the revolution or
long line in the barrel ......... 16
=
0.016 in.
(d) Measurement reading .......... TOTAL
=
0.241 in.
245


 Previous Page
