PRECISION MEASURING AND GAGING - OD1642 - LESSON 1/TASK 2
the square head so that it does not move and is in contact with the surface
of the plate. Settings are then made on the surface gage to be transferred
to the workpiece.
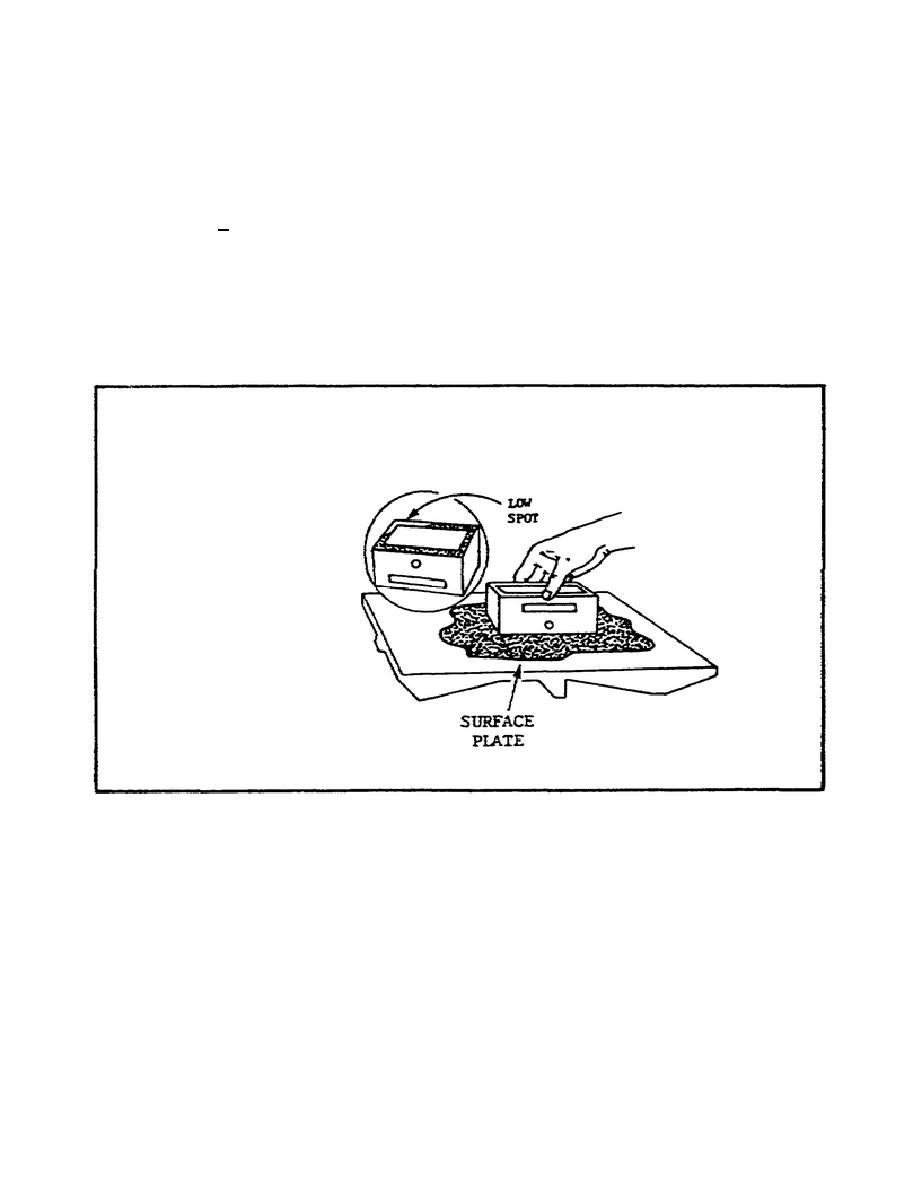
2 The surface plate is also used for checking surfaces that
are being scraped for flatness (figure 33).
To perform this operation, a
surface plate and nondrying prussian blue are used. The plate is covered
with a light coat of blue. The workpiece is placed on top of the plate and
blue, and moved over the surface. The blue will stick to the high spots on
the workpiece, revealing the areas that are to be scraped.
Once the blue
areas are scraped, the piece is checked again.
This process is continued
until the blue coloring shows on the entire surface of the workpiece.
FIGURE 33.
CHECKING A SURFACE ON THE SURFACE PLATE.
(18) Screw Pitch Gage.
(a) General. Screw pitch gages (figure 34 on the following page)
are made for checking the pitch of U.S. Standard, Metric, National Form, and
Whitworth cut threads. These gages are grouped and retailed in a case or
handle, as are the thickness gages.
The number of threads per inch is
stamped on each blade, in which are cut the exact form of threads of the
various pitches. Some types are
50


 Previous Page
