USE/CARE OF HANDTOOLS & MEASURING TOOLS - OD1621 - LESSON 3/TASK 1
1 The steel rule of the caliper is graduated in fortieths or
0.025 of an inch. Every fourth division, representing a tenth of an inch,
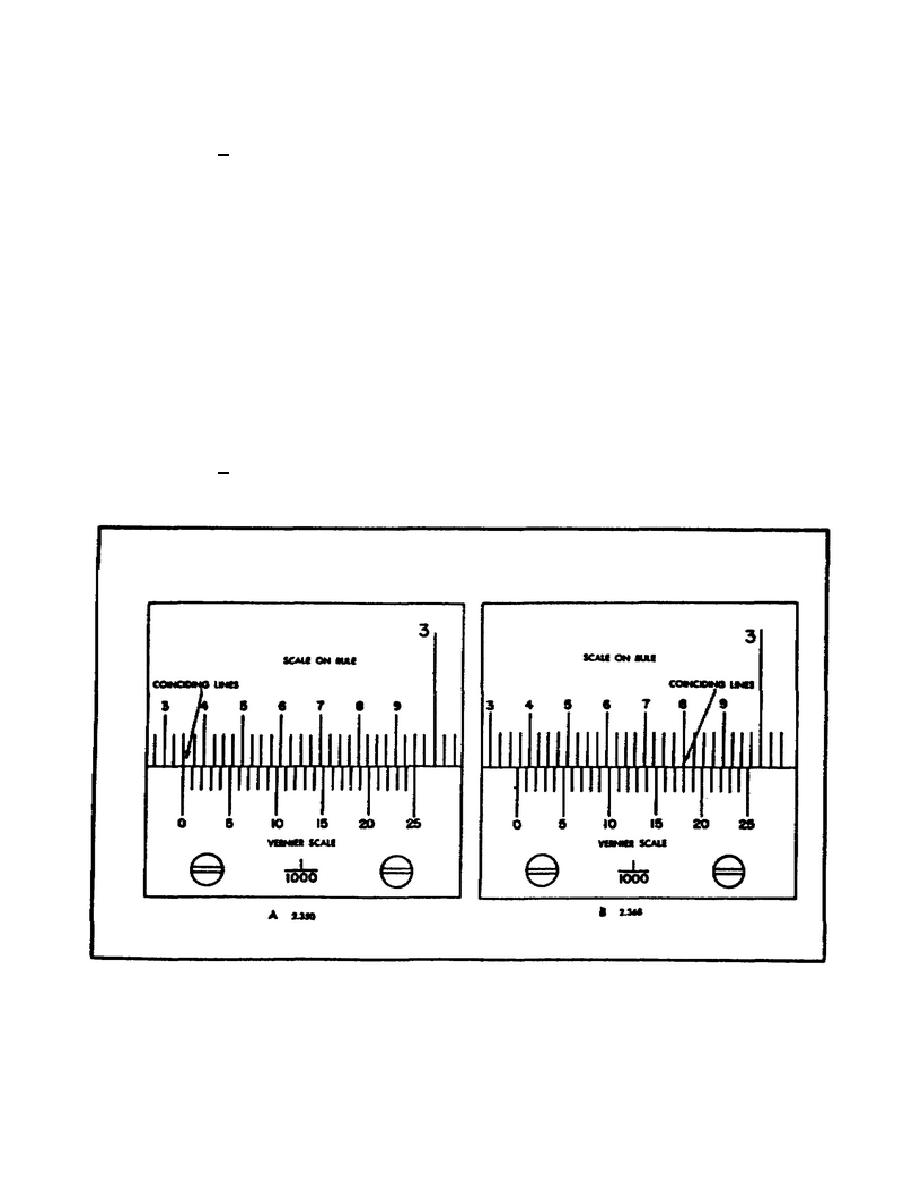
is numbered, as shown in the enlarged view in figure 188. The Vernier scale
is divided into 25 parts and numbered 0, 5, 10, 15, 20, and 25. These 25
parts are equal to and occupy the same space as 24 parts on the rule. The
difference between the width of one of the 25 spaces on the Vernier scale
and one of the 24 spaces on the rule is 1/25 of 1/40, or 1/1000 of an inch.
If the tool is set so that the 0 line on the Vernier coincides with the 0
line on the rule, the line to the right of 0 on the Vernier scale will
differ from the line to the right of 0 on second line by 2/1000 of an inch;
and so on. The difference will continue to increase 1/1000 of an inch for
each division until the line 25 on the Vernier scale coincides with the line
24 on the rule.
To read the scales, note how many inches, tenths (or
0.100), and fortieths (or 0.025) the mark 0 on the Vernier scale is from 0
mark on the rule; then note the number of divisions on the Vernier scale
from 0 to a line which exactly coincides with a line on the rule.
2 For example, figure 188, view A, shows the 0 mark of the
Vernier scale coinciding with a line on the rule. In this case, the Vernier
scale is
FIGURE 188.
READING VERNIER SCALE.
237


 Previous Page
