(4) Care of calipers. Never use a caliper for a purpose other than that
for which it was intended. Never pile these tools in a drawer. Never force
calipers beyond their capacity or setting. Never use these tools incorrectly-
changing settings by hammering instead of loosening a clamping screw or nut,
bearing down too hard when scribing with a divider, or wearing measuring surfaces
unnecessarily by using a heavy measuring pressure. Apply a protective film of oil
to tools when not in use.
e. Micrometers. These tools are used for measurements requiring precise
accuracy. They are more reliable and more accurate than the calipers discussed in
the preceding section.
(1) Types of micrometers. Micrometers are made in various shapes and
sizes, depending upon the purpose for which they are to be used. They all have a
precision screw adjustment offering great measuring accuracy.
(a) Micrometer caliper.
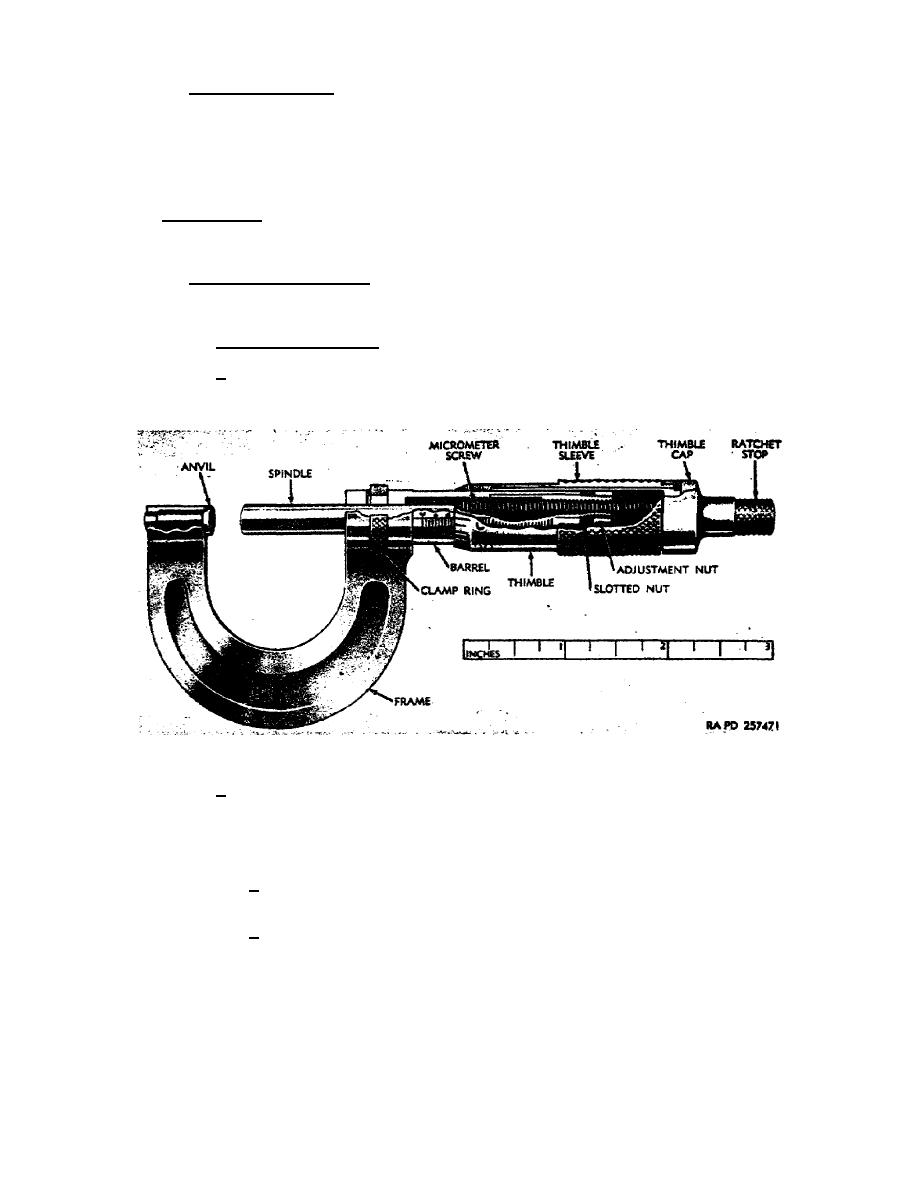
1. The micrometer caliper (fig 56) is the most common type. It has
a range of 0 to 1 inch and is graduated to read in thousands of an inch or in units
of the Metric system, from 0 to 25 millimeters by hundredths of a millimeter.
Figure 56.
Micrometer, caliper, cutaway view.
2. The frame can be smaller to the extent that the range of the
caliper is only 0 to 1/2 inch or 0 to 13 millimeters, or it can be larger so that
the range is 23 to 24 inches. The head has a constant range of 0 to 1 inch. The
shape of the frame may be varied to adapt it to the physical requirements of some
types of work. For example:
a. The frame back of the anvil may be cut away to allow the
anvil to be placed in a narrow slot.
b. The frame may have a deep throat to permit it to reach into
center sections of a sheet (sheet metal or paper gage).
45


 Previous Page
