

MAINTENANCE OF THE M88A1 - OD1672 - LESSON 3/TASK 2
FIGURE 38.
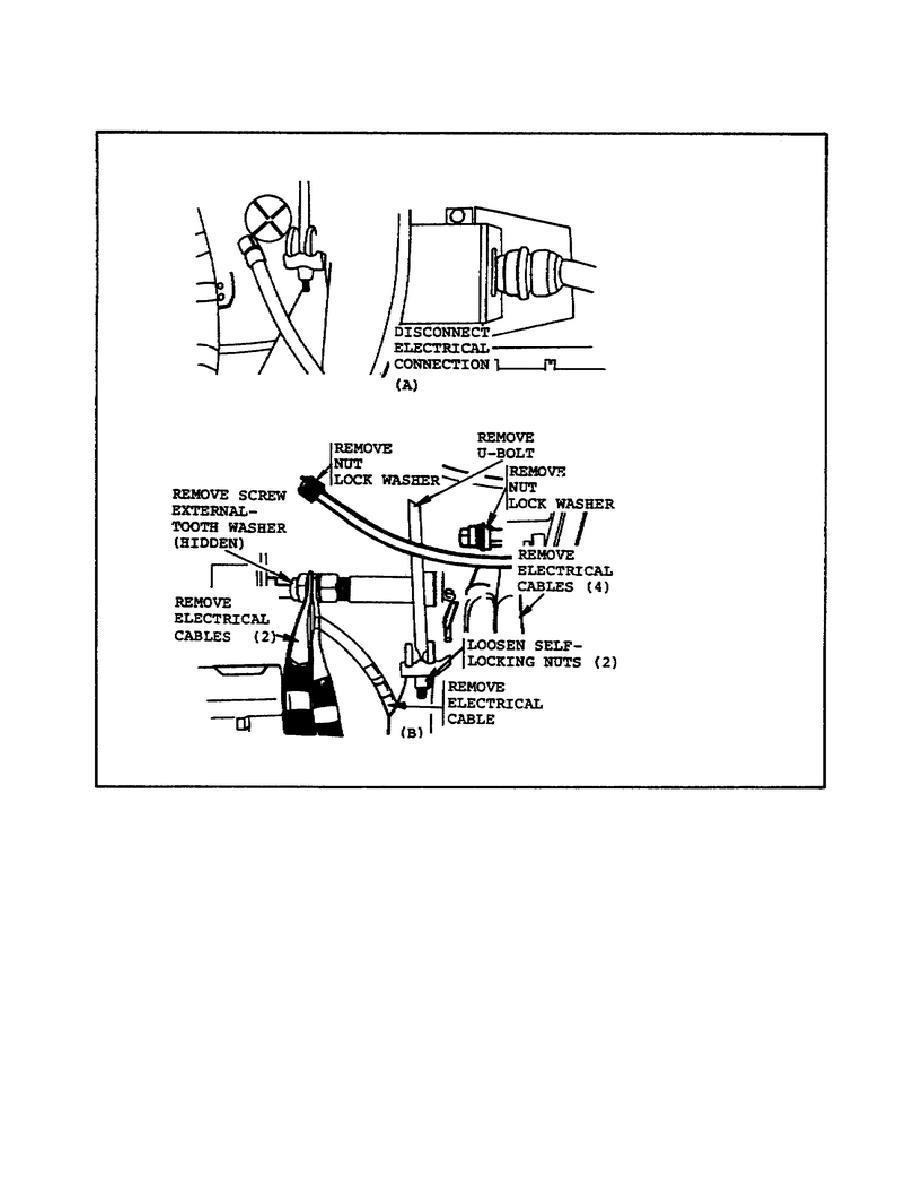
REPLACING THE STARTER.
Step 2. Install three bolts that hold the starter to the engine crankcase
(figure 39, view C, on the following page).
Step 3.
Install seven electrical cables and the U-bolt, and secure them
with nuts and lockwashers (as shown in figure 38, view B).
Step 4. Install the electrical connection onto the starter-module (as shown
in figure 38, view A).
This step concludes the removal and installation
procedure of the starter on the M88A1 recovery vehicle.
The following
paragraphs describe the vehicle wiring and miscellaneous electrical
components.
87


 Previous Page
