PRECISION MEASURING AND GAGING - OD1642 - LESSON 1/TASK 2
reading the metric graduated vernier; however, the following differences
should be noted:
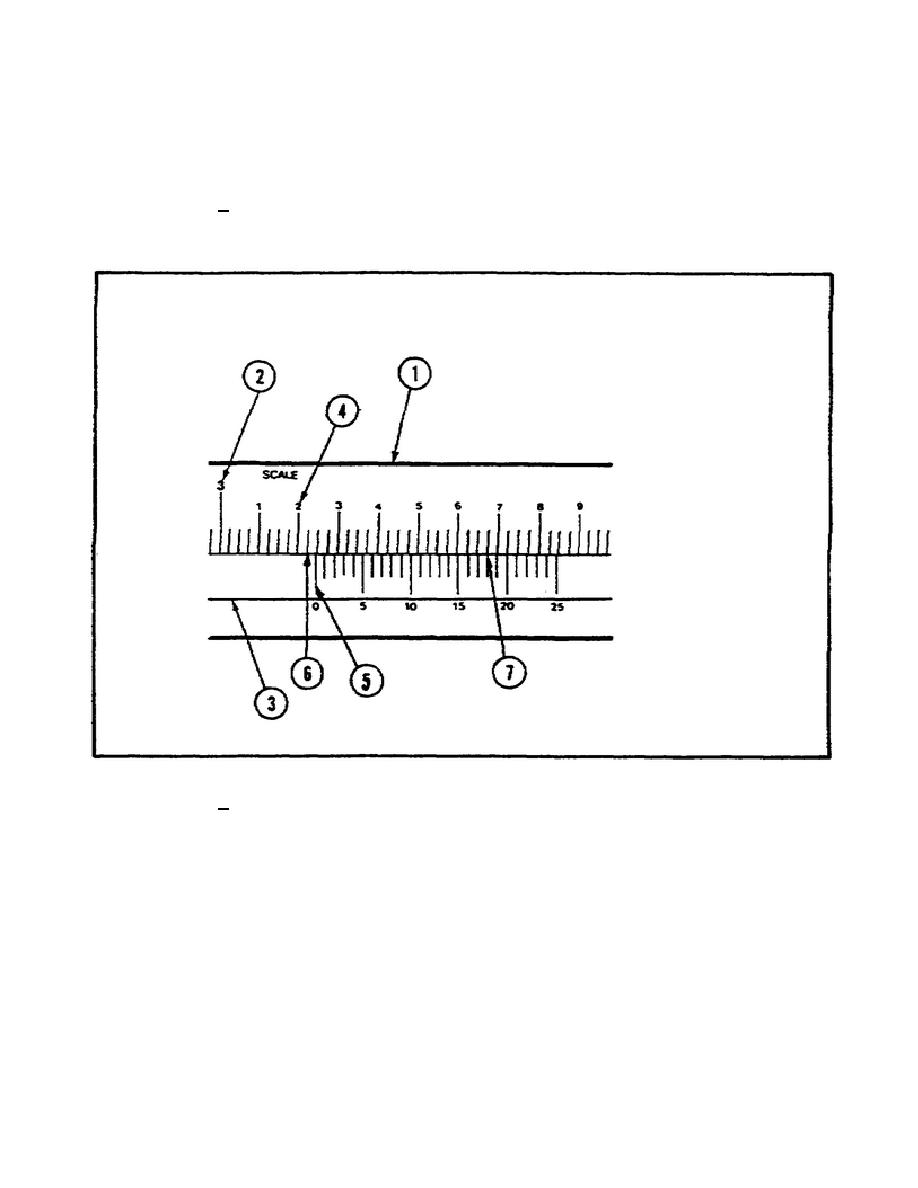
1 The steel rule or main scale (1) is divided into
centimeters (cm) (2) and the longest lines represent 10 millimeters each
instead of inches. Each millimeter is divided into quarters or fourths.
FIGURE 46.
READING A METRIC CALIPER.
2 The metric vernier scale (3) is divided into 25 equal parts
and is numbered 0, 5, 10, 20, and 25.
Read the total number of
millimeters (4) to the
left of the vernier
zero index (5) and record .............
32.00mm
Read the number of quarters (6)
between the millimeter mark
and the zero index and record .........
.25mm =
(1 quarter)
73


 Previous Page
