PRECISION MEASURING AND GAGING - OD1642 - LESSON 1/TASK 2
(b) The vernier scale (3) is divided into 25 parts and numbered 0,
5, 10, 15, 20, and 25. These 25 parts are equal to 24 parts on the steel or
main rule (1). The difference between the width of one of the 25 spaces on
the vernier scale and one of the 24 spaces on the main rule (1) is 1/1000
(0.001) of an inch.
(c) Read the measurement in figure 45 on the previous page as
illustrated below:
Read the number of whole
inches on the top scale (1) to
the left of the vernier zero
index (4) and record ................. 1.000 inch
Read the number of tenths (5)
to the left of the vernier
zero index (4) and record ............ 0.400 inch
Read the number of twenty-fifths (6)
between the tenths mark (5) and
the zero index (4)
and record........................... 3 X .025 = .075 inch
Read the highest line on the
vernier scale (3) which lines up
with a line on the top scale (7)
and record. (Remember 1/25 = .001
inch) ............................... 11/25 or 0.011 inch
TOTAL
1.486 inches
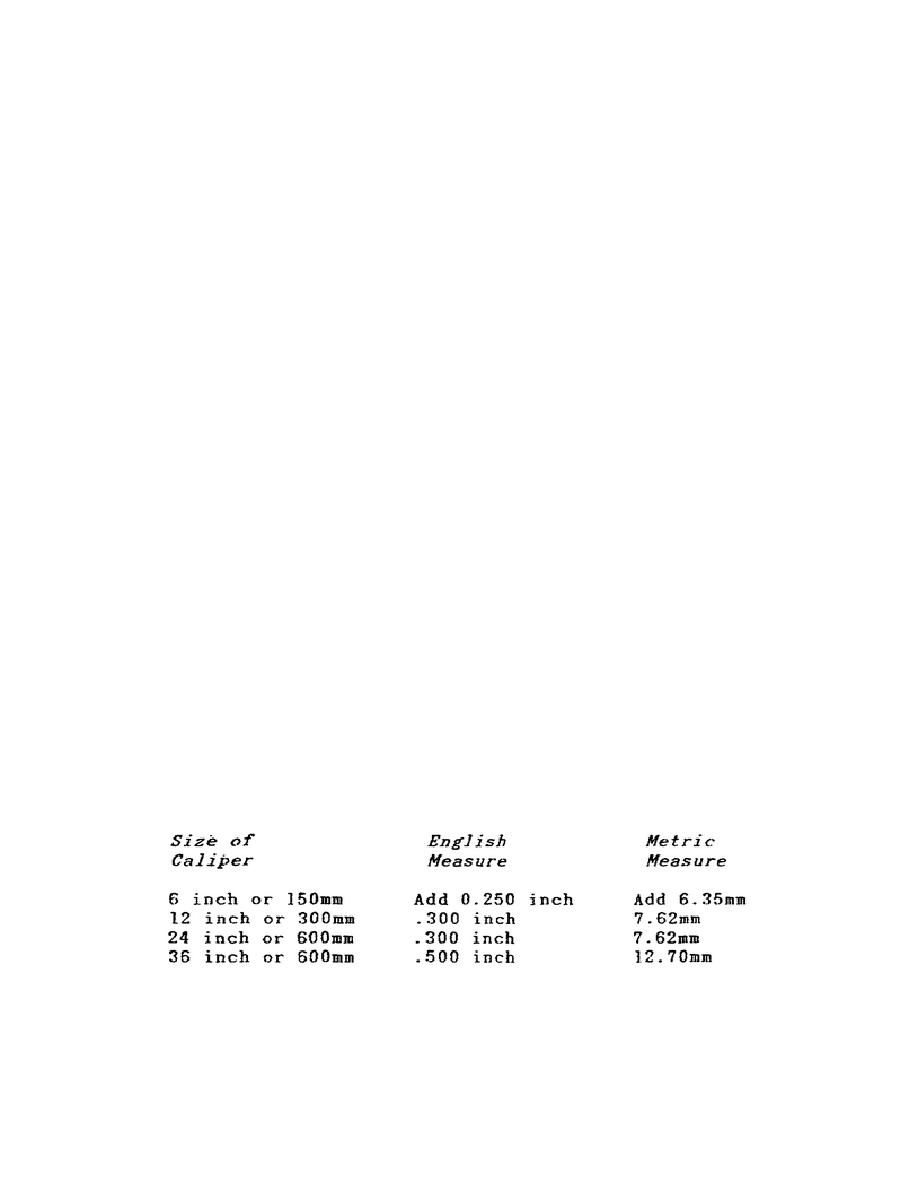
(d) Most vernier calipers read OUTSIDE on one side and INSIDE on
the other side. If a scale isn't marked, and an inside measurement is to be
taken, read the scale as you would for an outside diameter. Then add the
measuring point allowance by referring to manufacturer's instructions or the
following table.
(e) Reading a Metric Caliper (figure 46 on the following page).
The same principle is applied in
72


 Previous Page
