PRIN. OF DRAFTING AND SHOP DRAWINGS - OD1641 - LESSON 1/TASK 1
represents the object as it appears from directly overhead.
Another is known as
the "elevation" or front view and represents the object as it appears directly from
the front. Still another, designated as "side elevation" or side view, supplements
the top and front views by giving information not given in these views. Figure 1
(on the previous page) depicts an orthographic projection with three views. There
are three additional views that are sometimes, though rarely, used.
These views
are the bottom, rear, and left side view.
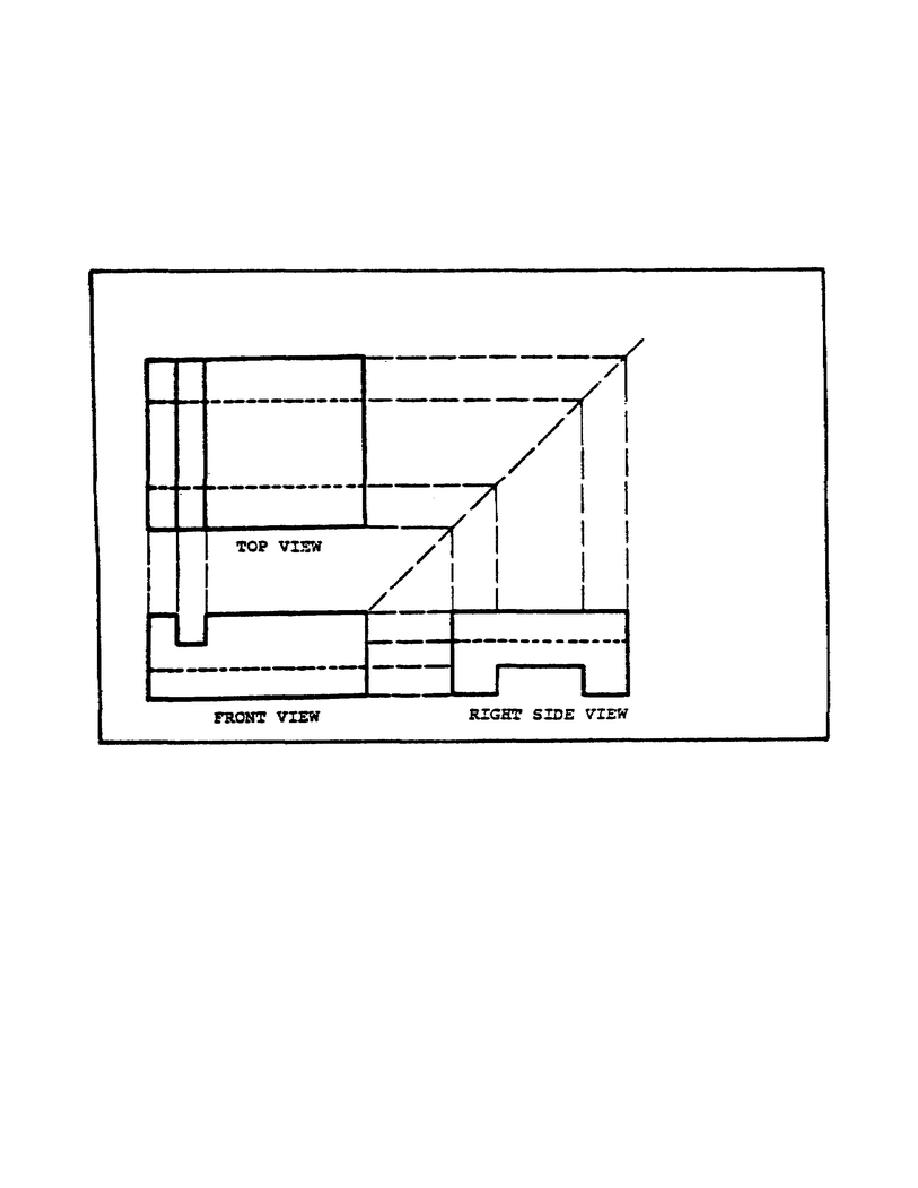
FIGURE 2.
VIEW ARRANGEMENTS
b. View Arrangement. When views of the various surfaces of an object are placed
on paper, their proper relationship is maintained by the proper arrangement of
views. Study the arrangement of the three views in figure 2. The front view is
the starting place. It was selected for the front view because it shows the most
characteristic feature of the object. The right side view is projected directly to
the right of the front view. Some of the lines in the right side view lie along
extension lines from the front view. Notice that the top view is placed directly
above the front view and that some of its lines lie along extensions of lines from
the front view. After
3


 Previous Page
